Monday, March 30, 2009

Nesco American Harvest FD-75PR 700-Watt Food Dehydrator

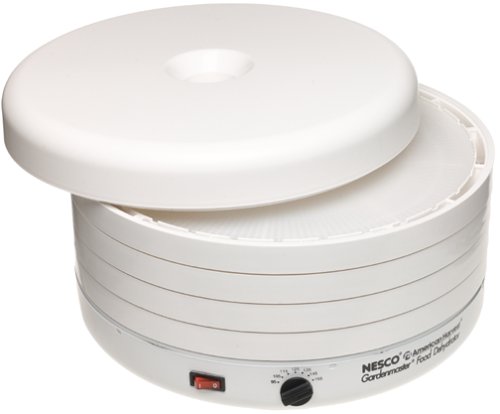
The NESCO Professional Food & Jerky Dehydrator has more power than most dehydrators -- 700 watts -- which means faster drying time. You will have results in hours, not days. The top mounted fan with patented Converga-Flow action pressurizes air downward through the outer ring and horizontally across each individual tray, converging at the center, for fast, even drying. No need to rotate trays. The adjustable thermostat allows you to dry different foods at proper temperatures (95-155 F), providing the flexibility to produce the best drying results. As your needs grow, the Professional Food & Jerky Dehydrator can be expanded up to 12 trays.


After you have harvested your vegetables you might not be sure what you should do with them. Even a large family will have a hard time eating a steady supply of fresh organic vegetables. The way to avoid wastage is to store your vegetables in your home.

It is true that some vegetables are easier to store than others but most organic vegetables can be stored and saved in some way or another.

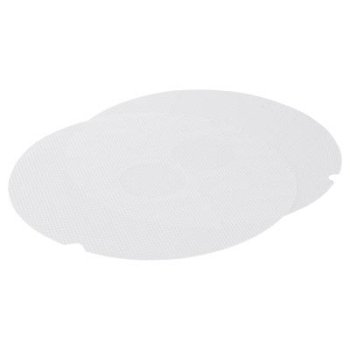
There are actually many ways to store your harvest so do not get frustrated if you feel that you have grown more than you can eat. Many grocery stores sell mason jars and supplies needed for making preserves and canning vegetables along with instructions on how to do this. The same stores sell cheesecloth which is great for placing vegetables on when drying if they are air drying.
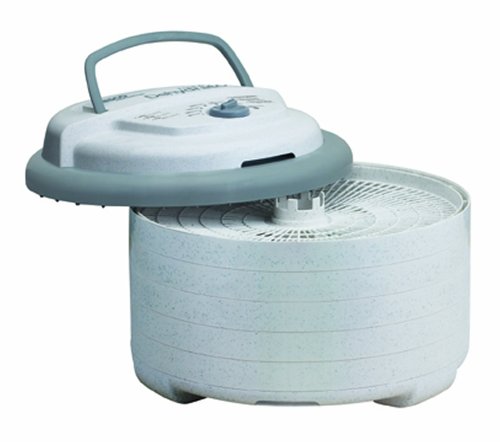
Food dehydrators can also be used for drying your vegetables along with your oven. When using an oven to dry vegetables set it for the lowest setting, usually 140 degrees, and watch carefully to make sure the vegetables are drying out and not roasting.

Lettuce

Once you have harvested all of your lettuce you can wash it, remove the core, and pat it dry with a towel. When you have finished store it in a plastic bag and put it in your refrigerators crisping section. This will help your lettuce remain crisp for up to a week.

Since it is harder to store vegetables for a long period of time it is recommended that you harvest your lettuce and start using it even before it has reached full growth. When it has reached full growth use what you can, store what you can use, and offer the rest to friends and family members. They will appreciate some fresh organic salad to use in their salads or to place on their sandwiches.

Root Vegetables

Root vegetables can often store longer than the other vegetables you harvest as long as they are harvested on time and correctly. Make sure your vegetables have not been bruised or damaged during the harvest. If they have been damaged throw them away since the spoilage can spread if you are not careful.

Many root vegetables such potatoes, carrots, sweet potatoes, and more can be stored in a cool, dark, dry place such as a root cellar or some pantries. Other root vegetables (carrots) can be dried with a food dehydrator or even in an oven set to a very low heat setting. Some vegetables such as turnips can even be stored in a refrigerator crisper, especially if they are going to be used soon.

Tomatoes

There are many ways to store tomatoes and that is a great thing since tomatoes are popular with many organic gardeners. Tomatoes can be stored well on a counter top or in a window sill if they are still a bit green. They can also be stored in the refrigerator.

Some people will dry tomatoes for later use in sauces or even preserve them. Tomatoes preserves either sweet preserves with ripened tomatoes or pickle preserves with green tomatoes can be a winter time treat.

Onions

Onions will store wonderfully in any dry, dark place. As long as the onions have not been bruised and have no sign of moisture they can be stored in a pantry or attic for a long time.

Beans and Peas

Beans and peas can often be harvested as needed but once it is time to store them there are several methods that can be used. Peas and beans can both be stored in bags in the refrigerator for several days. They also can be canned with the proper equipment. Beans can also be dried which is a popular way to store them. Once beans are dried and bagged they can later be soaked and cooked.

Corn

Corn can be stored in the refrigerator or, once the husk is removed, frozen for a long time. The kernels can also be dried, stored, and creamed at a later date.

Learn about the redbud tree and the weeping cherry tree at the Tree Facts site.

dehydrator

Saturday, March 14, 2009

food pantrie dehydrator and seed sprouter

SPROUT SEEDS FOR MAKING WHEATGRASS OR HIGH ENERGY FOOD FROM SPROUTS. DEHYDRATE FOODS NATURALLY WITHOUT ELECTRICITY. DRY JERKY - APPLES - APRICOTS - ONIONS - MUSHROOMS. CHOCKING HAZARD - CONTAINS SMALL PARTS - NOT FOR CHILDREN UNDER 3


Gators are a lot less scary when they come in the edible form of jerky! Exotic jerky, such as alligator jerky have become immensely popular among fans of dried and spiced meat. Alligator jerky is among other exotic choices such as emu, elk, ostrich and more. But you don't have to go to Mardi Gras or the Everglades to taste this treat ... you can make it yourself!

Making alligator jerky is really not much different than the usual beef jerky process. You just have to find somewhere that sells alligator meat. Most small town butchers will have this offering, and if they don't regularly stock it, they can get it. If you do not have a local specialty butcher, there are some online sites you can order it from, such as CajunGrocer.

Basic Alligator Jerky

Ingredients:

alligator tail

garlic salt

black pepper

Directions:

1. Cut alligator tail into long strips, one inch wide and one-quarter inch thick or less.

2. Prepare the jerky salt mix by combining the equal parts of garlic salt and black pepper.

3. Sprinkle a thin layer of the jerky salt mix on a cutting board.

4. Lay alligator strips on salt mix.

5. Sprinkle a layer of salt mix on top of alligator, so both sides are completely salted.

6. Stick a toothpick through one end of each meat strip and suspend strips from oven or smoker rack after shaking off excess salt.

7. Heat or smoke around 120 degrees until dry (about four hours).

8. Store jerky in airtight containers or eat right away!

Cajun Alligator Jerky

Since alligator meat is popular in New Orleans and Bayou-themed restaurants around the nation, Cajun flavoring seems like a natural choice for alligator jerky. This is a Cajun beef jerky recipe adapted to make alligator beef jerky.

Ingredients:

10 lb alligator meat

1/2 of a small bottle hot sauce

1/8 cup lemon juice

10 oz Worchestershire sauce

6 oz Soy sauce

1/8 cup Caynne pepper

1/2 small Bottle onion salt

1/2 small Bottle liquid smoke

Directions:

1. Mix ingredients.

2. Marinate 24-30 hrs.

3. Dehydrate in dehydrator or a 150-degree oven.

Buying Alligator Jerky

Many jerky makers pride themselves on their exotic selection. Dave P. from Wilkes-Barre, PA favors Alligator Bob's brand.

"I've always been a fan of beef and deer jerky, but I never got into the delicious recipes and information about beef jerky, please visit our site. But once I saw alligator jerky -- while in Florida of course -- and at first I thought, 'ew.' Then, I remember that I tried alligator sausage at a Cajun place in State College and liked it. I gave Alligator Bob's a try and man, was it tasty. I'd say that alligator meat sort of tastes like chicken and it is whiter meat as well. The Cajun seasoning was just right. I like spicy stuff and this was just fantastic. I am glad that I can order this stuff online!"

If you found this information on alligator beef jerky useful, you'll want to read this article about beef jerky risks.

dehydrator

Monday, March 9, 2009

Nesco American Harvest FD-1010 Gardenmaster Food Dehydrator

Drying apple slices in just three hours and beef jerky in four, this 1000-watt dehydrator is exceptionally fast, using a big, 4-1/2-inch fan to force air up through the drying trays' outer rings and across each tray. A thermostat adjusts from 95 degrees to 155 degrees for drying different items. Each of the four plastic trays is 13-3/4 inches in diameter and 1/4 inch deepthat's four square feet for drying fruits, vegetables, herbs, or flowers at one time. Additional trays can be ordered separately, and up to 30 trays can be stacked on this unit's metal base at once. A fruit-roll sheet inserts into a tray so that applesauce or other fruit sauces can be dried into healthful snacks, and soups and sauces can be dehydrated for camping trips. Beef-jerky spices and a detailed 64-page recipe and instruction booklet are included. The dehydrator measures 15-1/2 inches in diameter and 10 inches high, cleans easily, and carries a one-year warranty against defects. --Fred Brack


There is a misconception that having a healthy cooking lifestyle will have a huge strain on your pockets. This is not true however although of course there are some cases. But not necessarily! The ingredients you buy may depend. With a lot of money, you can create any healthy dish you want but you could also do it inexpensively. The main thing that you have to practice is wise shopping. You could do this by asking advice from those who do and undergoing research yourself. Ask lots of questions as possible.

Appropriate everything. If you have a limited budget, then do not buy cooking guides that are meant for those with lots of money. Remember your ingredients. You don't want to be stuck with a guide that requires you to buy ingredients that you can?t afford. Some healthy cookbooks offer fairly inexpensive recipes. You would be sure to find one don't worry.
You could surf the web to find out more about inexpensive cooking. There are a lot of suggestions and recommendations to help you every step of the way. You could learn new ideas that you haven't thought of before.

To help you in your goal, look for sources in the library, your favourite bookstore or even the local grocery. You will also find a lot of ideas and tips on other books and magazines. You could also interview or pick the brains of those who already follow a healthy yet inexpensive lifestyle. There are no greater tips than those that have been tried and tested first, after all!

The first thing that you might want to do is to buy items in bulk. There are cases wherein you even get a discount when it comes to buying many items. Check the grocery store that offer such deals and the vegetables that it applies to. But keep in mind the dates that they are still optimal for consuming.

You also want to take into account that dining out, even with just ordering salads, could still take a toll on your budget. You don't want to fall into that habit as usual salads cost up to as much as $15. You could opt to shop for the ingredients yourself for the same amount of money. It will even last longer! If you are serious about pursuing a healthy but inexpensive lifestyle, you have to make wise decisions about budget constraining activities like constantly dining out in restaurants.
This is actually applicable to any part of your diet. Many people do not realize that you spend more money when dining out than buying the ingredients and making the recipe yourself. It has also the advantage of letting you know what exactly it is you are eating. Having a restaurant salad doesn't assure you that you know all of the ingredients. You might be allergic to some so be careful. And since the cooking process is rarely put on the menu, then you never know if they're putting in stuff that you are trying to avoid.

Abhishek is really passionate about Cooking and he has got some great Cooking Secrets. up his sleeves! Download his FREE 88 Page Ebook, "Cooking Mastery!" from his website http://www.Cooking-Guru.com/770/index.htm. Only limited Free Copies available.

dehydrator

Thursday, March 5, 2009

food pantrie dehydrator and seed sprouter

SPROUT SEEDS FOR MAKING WHEATGRASS OR HIGH ENERGY FOOD FROM SPROUTS. DEHYDRATE FOODS NATURALLY WITHOUT ELECTRICITY. DRY JERKY - APPLES - APRICOTS - ONIONS - MUSHROOMS. CHOCKING HAZARD - CONTAINS SMALL PARTS - NOT FOR CHILDREN UNDER 3


(Insect Repellent) - No surprise here.

Mosquitoes, ever heard of them? Around here, they are big, they are mean, and they are plentiful. Not to mention, they are stealthy, stubborn and annoying. Everyone hates that ever familiar sound of a mosquito buzzing around your head, It conjures up feelings of anxiety and, in some cases, sheer terror. I have actually fled an area before, just to avoid being their lunch. Most wooded areas stay moist during the warm months, making them the perfect habitat to breed mosquitoes. The first thing you will need to do is find a repellent that is right for you. There are many varieties of Repellent on the market, the most popular and most effective one contains a chemical called DEET, but there are other types of natural ingredient based repellents also. One common misconception about bug spray is that it is being absorbed into your blood stream, and poisoning your body. Trust me; everything you touch on a daily basis has the potential to make you deadly ill. There are probably more bacteria in your kitchen sink that are more likely to cause you harm, then any bug spray will. When used as directed, bug spray is no more harmful than any other product we apply to our skin on any given day. You just have to use your head, read the instructions thoroughly, and take into consideration things like, the length of time you are going to be outdoors, the time of year, etc. My repellent of choice is Deep Woods Off, I tend to stay out longer and sometimes hike into the evening hours, when mosquitoes are at their worst. Other considerations to keep in mind are as follows:

  • Apply repellent lightly, heavy coverage does not provide you any more protection.
  • Wash your hands before eating
  • Do not spray the product on your face, spray it on your hands and wipe it on your face, keeping it away from your eyes and mouth.
  • Check recommended usage for children. Do not let them apply it to themselves; children have a tendency to stick their hands in their mouths.
  • Do not exceed the recommended usage.
  • Try to keep from applying repellent to areas of broken skin or areas that have a rash.

(Footwear) - These boots are made for walking.

In most cases, there are wide varieties of situations that will dictate what types of footwear you will need on your hike. If you are just going on small nature trail that has primarily smooth or flat trails, then wear what is comfortable for you. If you plan on hiking on rough, rocky or elevated trails, you might want to consider boots.

What type of boots you purchase is totally up to you, just make sure they fit before you get out on the trail and find out the hard way. One reason I prefer boots is the uneven terrain that I have come across over the years. They give me the support and traction I need when I am coming down a hillside, or hiking on a rocky trail. If you have ever hiked in the fall, then you know that the leaves can cover some of the rocks and mud, making conditions perfect for a sprained or broken ankle.

(Rain gear) - Predict the unpredictable

Weather in Southern Indiana can change faster than you can lace you boots. It is the most helpless feeling being out in the woods when a storm pops up, especially if your miles from anywhere. One thing I have with me at all times is a poncho. They sell small ones that will fit right in your pocket. You can usually pick up a pack of two for about a dollar. Trust me; it could very well be the best investment you make in this area. Some people do not like ponchos and prefer to use an umbrella. To each their own, if you wish use an umbrella, then go right ahead. A poncho can be very uncomfortable for some people and they are very hot if you have to wear them for long periods of time. Just make sure you have something with you just in case the weather turns on you. Never underestimate Mother Nature in the Midwest, it can be sunny one minute and hell on earth the next. It does not hurt to be prepared.

(Camera) - Look at the view from up here.

A camera is something I never go hiking without, it is the one tool I have with me at all times. Besides, you are going on a hike to enjoy the natural beauty of the wilderness, aren't you?

One of my favorite times to hike is in mid April, when the wildflowers are in full bloom and the under story greenery is enjoying the sun before the canopy fills in. Second, only to spring is fall, you just cannot beat the burning colors in Brown County. Whether you enjoy the winter, spring, summer or fall, Southern Indiana provides some of the most majestic backdrops for even the amateur photographer.

(Water) - cool, crisp, refreshing.

It really does not matter how long your hike is when water is concerned. You just cannot survive without it. One thing that I have realized is, no trail is an easy walk. If your not used to hiking, you will be surprised how fast you can become dehydrated. Sometimes the stimulus in the woods can distract you. The natural beauty of things can keep your mind occupied for hours. One thing people do not realize is how far they can walk when they are not thinking about walking. That is why it is a good idea to have water handy, preferably in a refillable bottle. As soon as your mind catches up with your feet, you are going to enjoy that bottle of water as if it is the last one on earth.

(G.O.R.P) - Good old raisins and peanuts

If you are planning on going on a longer hike, you may want to consider taking some kind of snack. It does not have to be raisins and peanuts, if you like chocolate, take some with you. I recommend M&M's because they do not melt all over the place. You can also take Beef Jerky, granola bars, energy bars or dried fruit.

The sky is the limit. Just remember, it is not for lunch, these types of snacks are designed to be high in protein, carbohydrates and sugar. Their main purpose is to sustain your energy level as you are hiking. I like to call it "hiking fuel". The options are endless, you can make your own trail mixes at home, if you prefer, or you can usually pick up some ready-made treats at any grocery store. If you like dried fruits or beef jerky, then you may want to invest in a food dehydrator. I recently received one as a gift, and it is worth it weight in gold.

(Hiking Stick) - Staying grounded

Hiking sticks or hiking poles, what ever you want to call them, are one of greatest assets to have on a hike. They have proven themselves worthy many times over for me. One of the best things about them is they are plentiful. As your walking along the trail, you are sure to find a limb lying around that will serve as a nice hiking stick. Have an old broom or mop? They make great hiking sticks as well. Hiking sticks can be made from just about anything you can think of. If money is no object, you may want to pick up a real set at your local outdoors shop, which is fine as well. One advantage to store bought poles is there adjustability to any person's height; they are collapsible and are extremely lightweight. Many people use them for many different tasks on the trail, they help keep you balanced when you are crossing a stream, or crossing uneven terrain. They also reduce the muscular impact on your legs, back and feet. They help me to keep low-lying branches out of my face, and if it is an early morning, I will use it to clear the spider webs that cover the trail. I even have an attachment for my camera so I can use my hiking pole as a tripod. No matter how you use them, they are a necessary tool on any hike, should you choose to use one or two poles is totally up to you. Some people hate to use two poles, other live by it.

Well, there you have it; you are now ready to enjoy yourself on your next hiking trip. I could go on forever, but I have to get out there and enjoy nature for myself.

http://sibiketrails.fateback.com

Tim Tanguay is a local trail enthusiast, who loves the outdoors. He runs a website called Southern Indiana Trails which is devoted to educating people about wildlife Conservation.

dehydrator

Sunday, March 1, 2009

Nesco Clean-a-Screen for Dehydrator Item# 168605, Model# LM-2-6

Screen flexes to remove sticky fruits and jerky quickly and easily. Herbs and spices wont fall through tray spokes. Includes 2 screens. Dishwasher safe. U.S.A.


Now that we have covered location, soil, and how big you want your garden it is now time to determine what you would like to grow in it. Unfortunately, there isn't a list I can give you since each family has different needs, but as you plant your garden, think carefully about what you will actually do with the harvest, the time you have to preserve if necessary, and what your family likes to eat. If they hate cherry tomatoes, there is no sense in planting them!

Before you go to a nursery and see all those lush beautiful plants and get carried away, make sure you have a plan. Similar to grocery shopping, if you go without a list you will most likely end up buying items you do not need!

Start with you family's favorites, then check the yields on the seed packets to try to determine how much you will need. If you are purchasing plants from a nursery, ask them to help you choose. When deciding what to plant ask yourself:

1. Does my family like it?

2. Do I have the room to grow it?

3. Do I know where in my garden it will go?

4. What am I going to do with the harvest (ie dehydrate, can, freeze etc)

If you are planning on canning, dehydrating, freezing etc, make sure you have adequate supplies and resources for it. If you don't have an extra freezer, it may be difficult to freeze a lot of items. If you don't have a dehydrator, can you borrow one? And if you don't have canning supplies, can you borrow, share or purchase some?

If you are a beginning gardening, this is an area that will get easier with experience. Once you know what worked and what didn't your next time around planning your garden will be easier. Make sure you keep a garden journal and note yearly yields noting if you should plant more or plant less or at all!

Now that I have you convinced on the size, you will need to consider how much to grow. I recommend vegetables that are high yielding and do not take up a lot of space and are easy to maintain. These would be:

Bush snap beans, or pole beans

Peas

Leafy greens, loose leaf lettuce

Tomatoes

Bell pepper plants.

Herbs

Some vegetables that will take up more space but are still worth considering are:

Vining melons (like watermelon)

Squash (summer, zucchini, cucumbers, etc)

Pumpkins

Sweet corn

Before you choose what to plant, stop and think what your goals for you garden harvest? Is it to have a fresh garden salad on the table every night? Or do you want to can your own spaghetti sauce? Or both?

Another factor in determining what to plant is your zone, or basically what will grow in you area based on the climate. Often times on the back of your seed packets or on your plant tags it will say which zones it will grow in. You will need to know this zone in order to choose your plants. Obviously, if you are purchasing plants from a nursery you can be pretty sure it will grow in your zone. But if you are choosing seeds or ordering from a catalog, knowing your zone will come in handy. You can find a zone map here, and by typing in your zip code you will instantly know which zone you are in.

The last factor I would consider when determining what to plant is asking yourself if the plant is worth the work for what you get, and will it save you money at the grocery store? For me, potatoes are really not worth it to grow because I can buy them so cheap at the store, often marked down, and they would take up considerable space in my garden. I have not had much success in our area with watermelon, and since I cannot store it, it is easier for me to buy it at the grocery store where it goes on sale all summer long. Corn is so inexpensive, it is another item I typically do not grow. I do like the stalks for decoration though, and sometimes I will plant a few for that reason. Canned pumpkin is much easier if I want to make pumpkin pie, so I don't usually plant pumpkin. Consider what kind of tomatoes are always inexpensive at your store. Is it worth it to grow this kind? Maybe growing a different kind, more expensive variety, of tomato will work better for you. Your garden should save you money with your harvest, so take these things into consideration when you plant.

Don't limit yourself to only vegetables. Usually you can buy strawberry plants, blueberry bushes, raspberry bushes etc at any nursery or through a catalog (I like Four Seasons the best for price, quality and guarantee). Fruits are usually more permanent, in that they come up each year although you may have to wait to yield a harvest. Fruits are well worth it to consider planting as they are well worth the time, money and effort.

Stephanie is a homeschooling mother of 3 and owns A High And Noble calling, a blog to encourage and inspire women in their noble callings as homemakers, wives and mothers. You can read articles, find resources, and inspiration for your high and noble calling at http://www.ahighandnoblecalling.com

dehydrator